
Achieve maximum impact with minimal effort by utilizing our step-by-step staging guide.
When it comes time to sell your home, the main objective is to make the space as appealing and inviting as possible. Through a process called “staging” you can create an environment that will be welcoming and captivating to potential buyers. We’ve broken down this process into seven steps that will bring your space from outdated to on-trend. Not ready to sell? These same steps can be applied to your home to freshen things up and make your space feel new again.
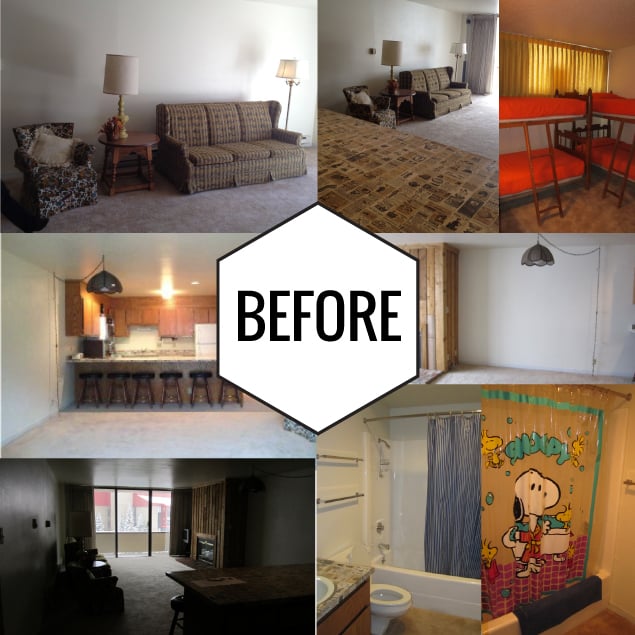
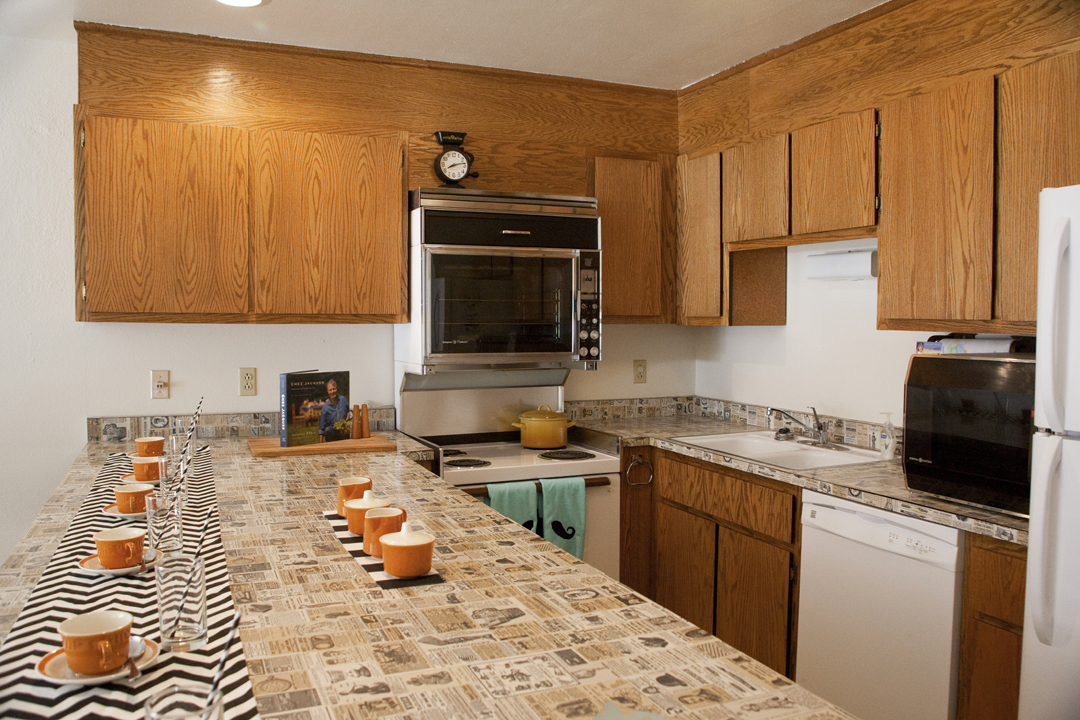
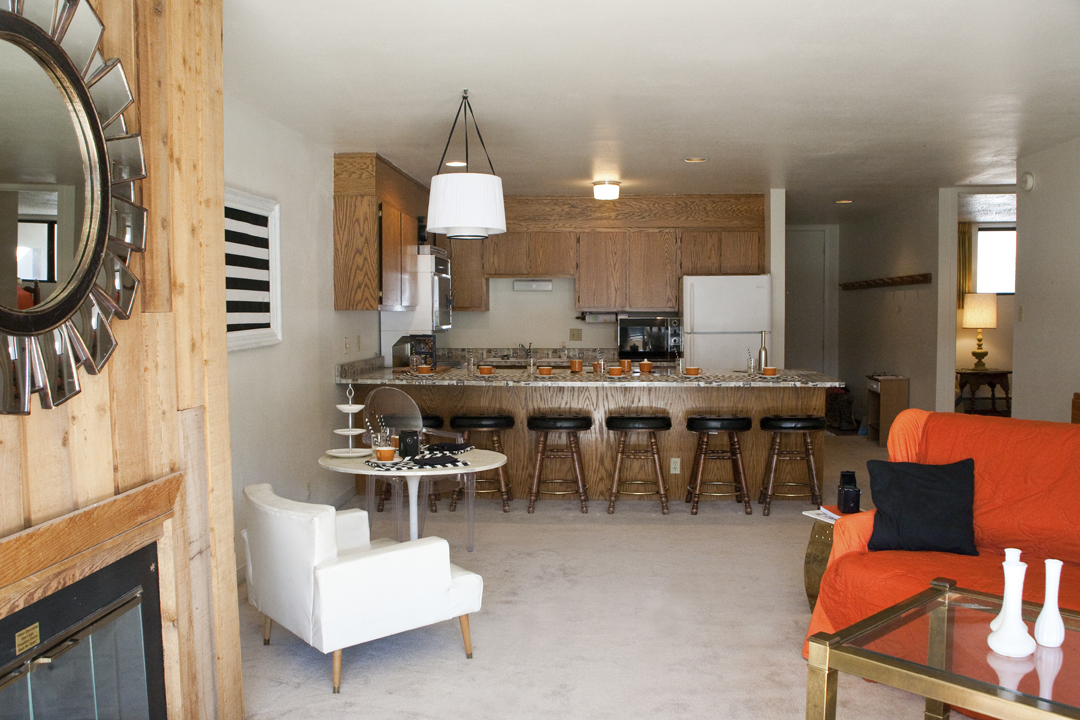
Don’t be intimidated. We aren’t tackling tearing down walls or installing new countertops. We’ll stick to surface changes that can be accomplished using a tiny budget to achieve big results. For this 1976 condo, the interiors were initially a bit daunting, but we were confident that if we focused on the positive aspects of the space, we could help the buyers envision this as their future second home. The condo is filled with beautiful natural light, a spacious and open living room and kitchen area, two full bathrooms, and an lovely outdoor patio. We knew we could turn this retro gem into modern stunner. Follow along as we show you how we implemented each of these steps.

1 – Clean Slate
Removing all clutter and un-personalizing your home is the first and most important step. This may seem obvious, but it’s the quickest way to make the largest impact. Stand back and take an honest look at the space – which objects are enhancing the space and which are cluttering it? Try snapping a picture with your phone, and examining the room through the image. When you’ve occupied a space for years, it can be hard to objectively see what’s in the way and what’s important – viewing the space through a picture may help. Next, remove personal artifacts. While you may find unicorn figurines adorable, chances are, most buyers will not. The personal touches that make your house into a home should be removed and packed for your next home. You want to create a clean slate that allows the buyers to envision the space with their own personal touches. Declutter all “tops” – kitchen counter tops, dresser tops, desk tops, etc. The last piece of this first step is to clean. Clean, clean, then clean again. Nothing will turn off future buyers as quickly as a dirty bathroom or kitchen. Bring in a professional cleaning service or carpet cleaners if that helps you get the process started.

2 – Establish a Color Scheme
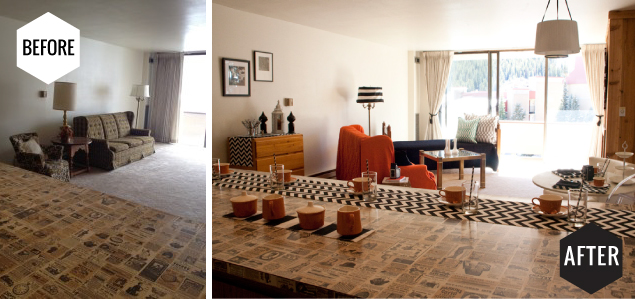
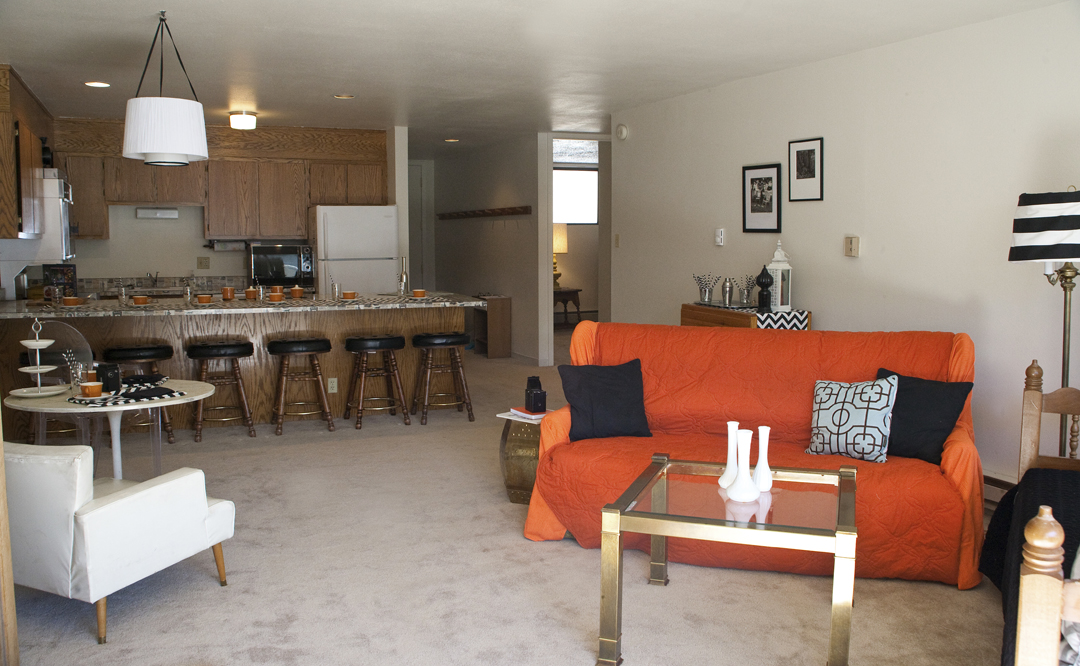
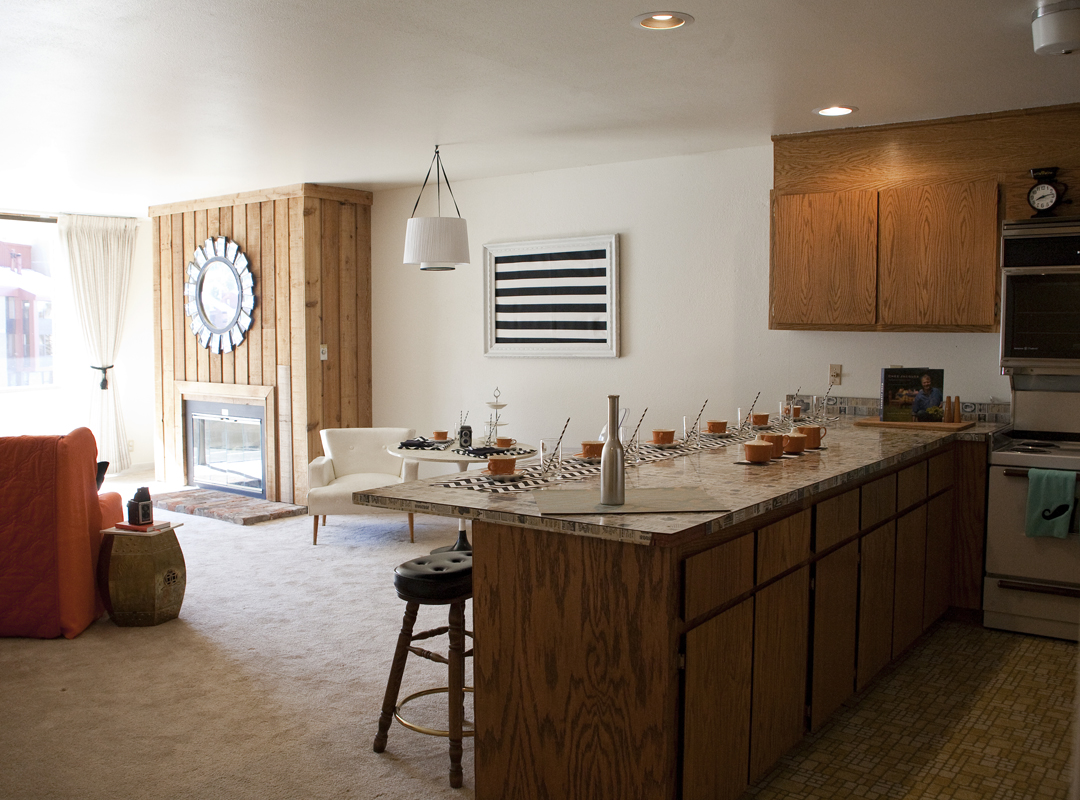
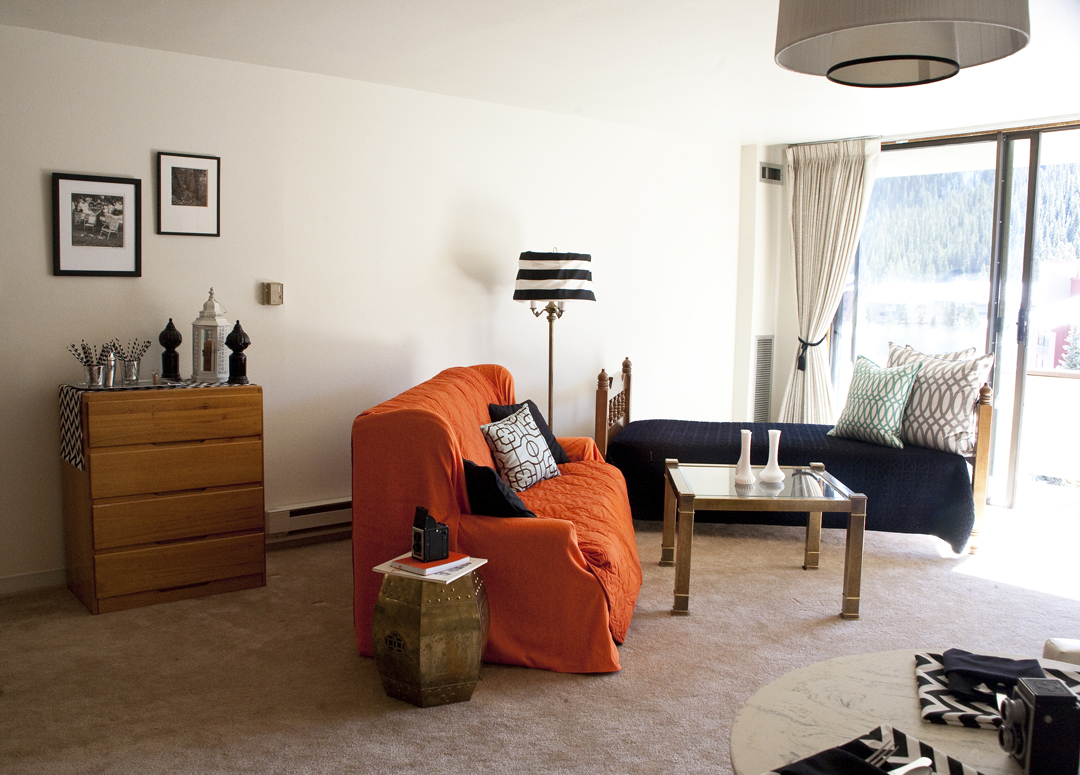
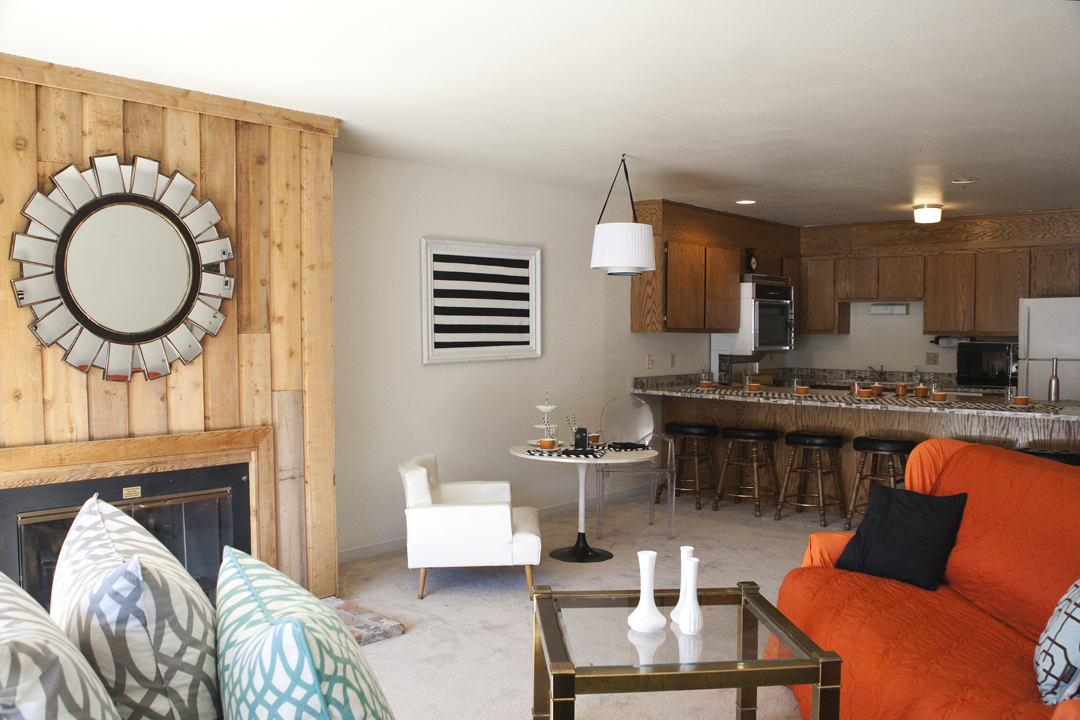
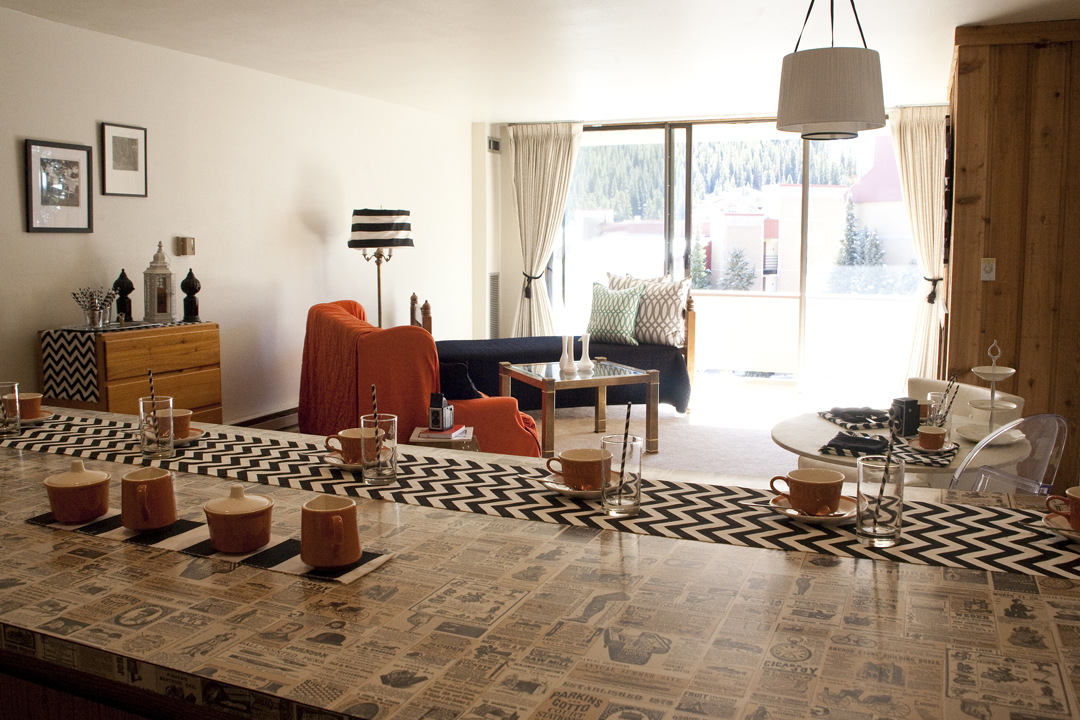
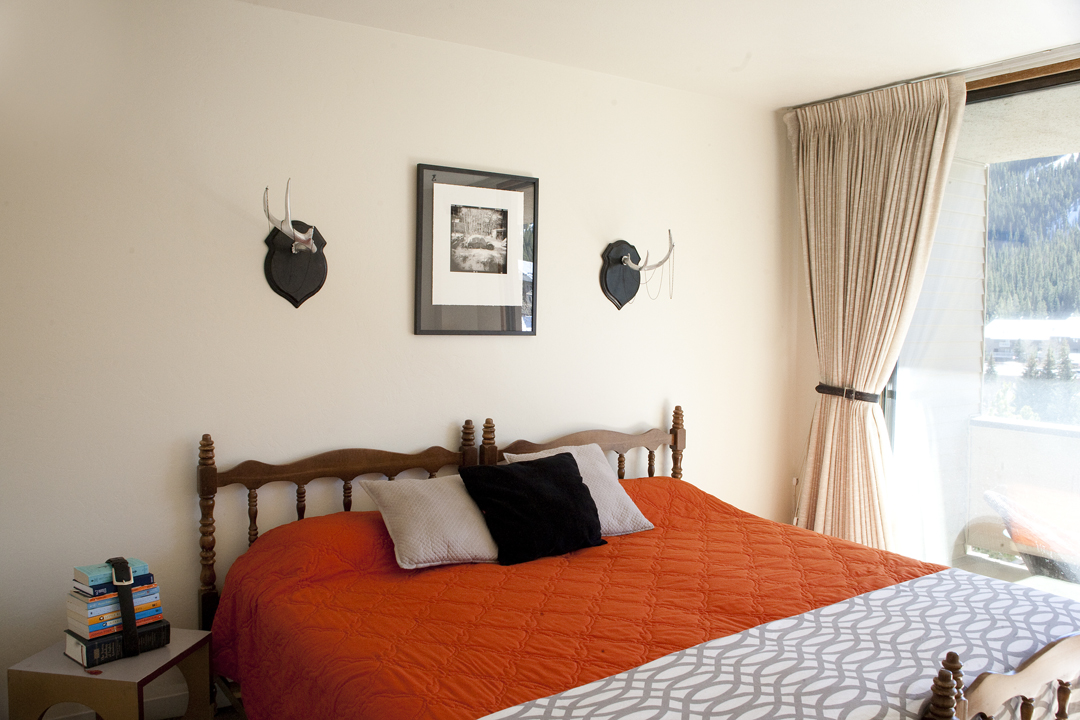
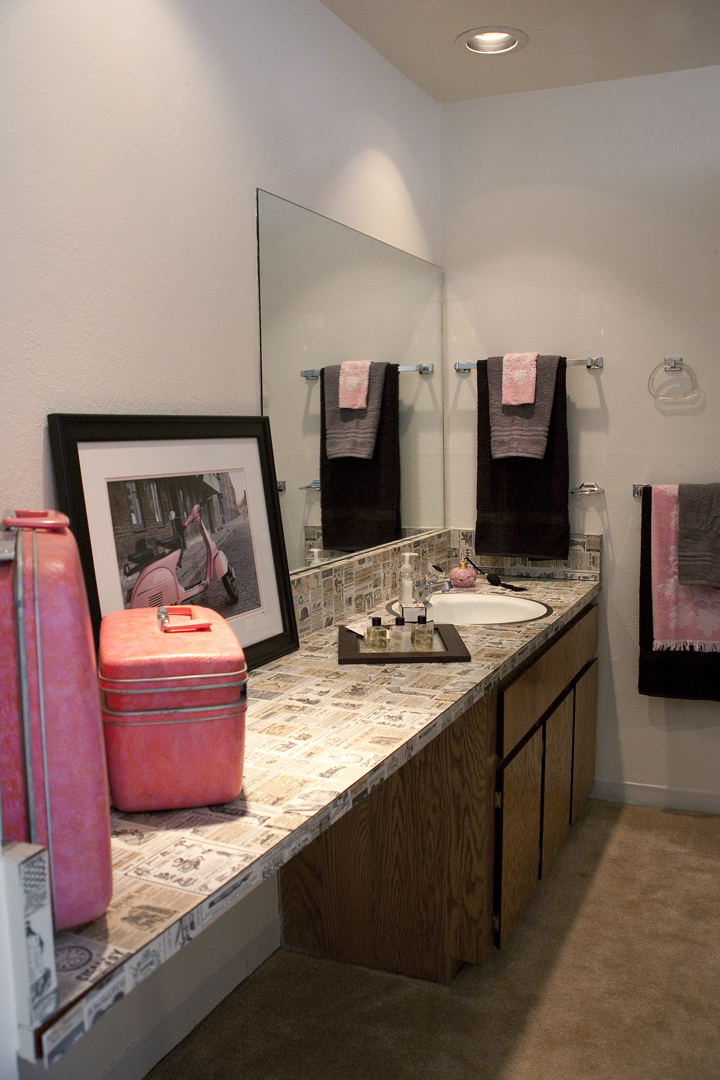
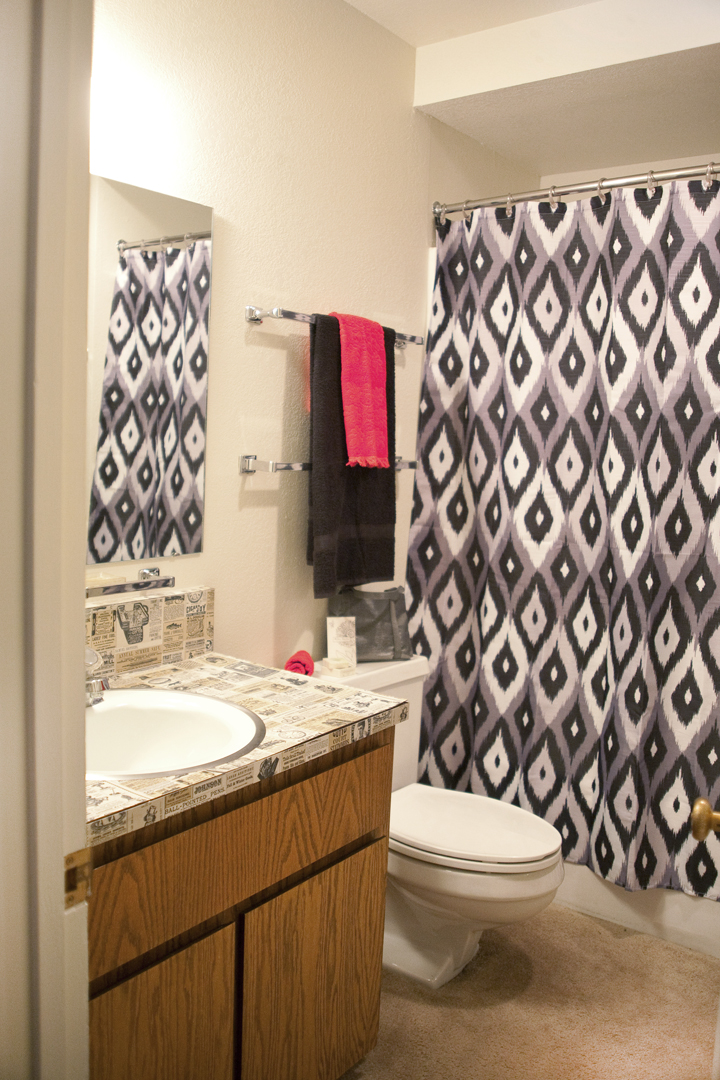
Establish a unified color scheme throughout your entire home. Chances are you have a favorite color that appears throughout your home. Work with this, rather than against it, by choosing the most prominent color in your home, then create a sophisticated color palette around this color. In this condo, the vibrant orange was already in place. We chose complementary colors to enhance the shade and bring it from dated to modern. Once you’ve established a small color palette (2 – 3 colors), stick with it and try to use these colors predominantly throughout each room. When it comes to patterns, pick just one. Keep in mind that the main goal is to create a cohesive look and soothing energy throughout the home, so introduce one pattern that coordinates with your chosen color scheme, then try repeating this pattern on pillows in the living room, placemats in the dining room, shower curtain in the bathroom, etc.
3 – Highlight Strengths
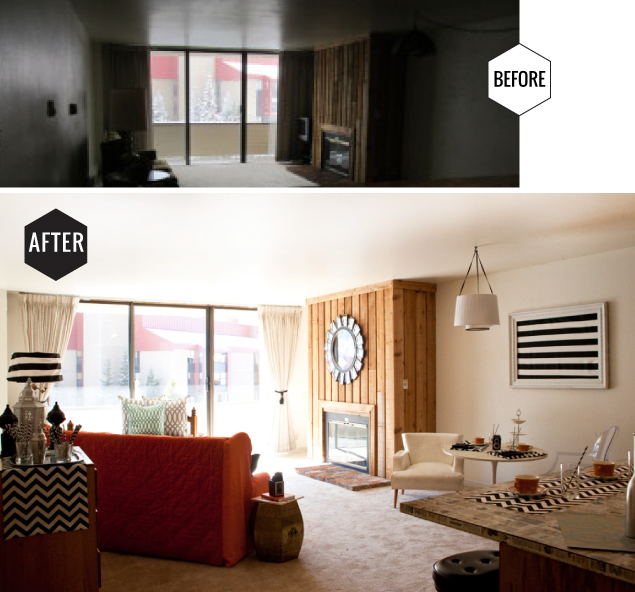
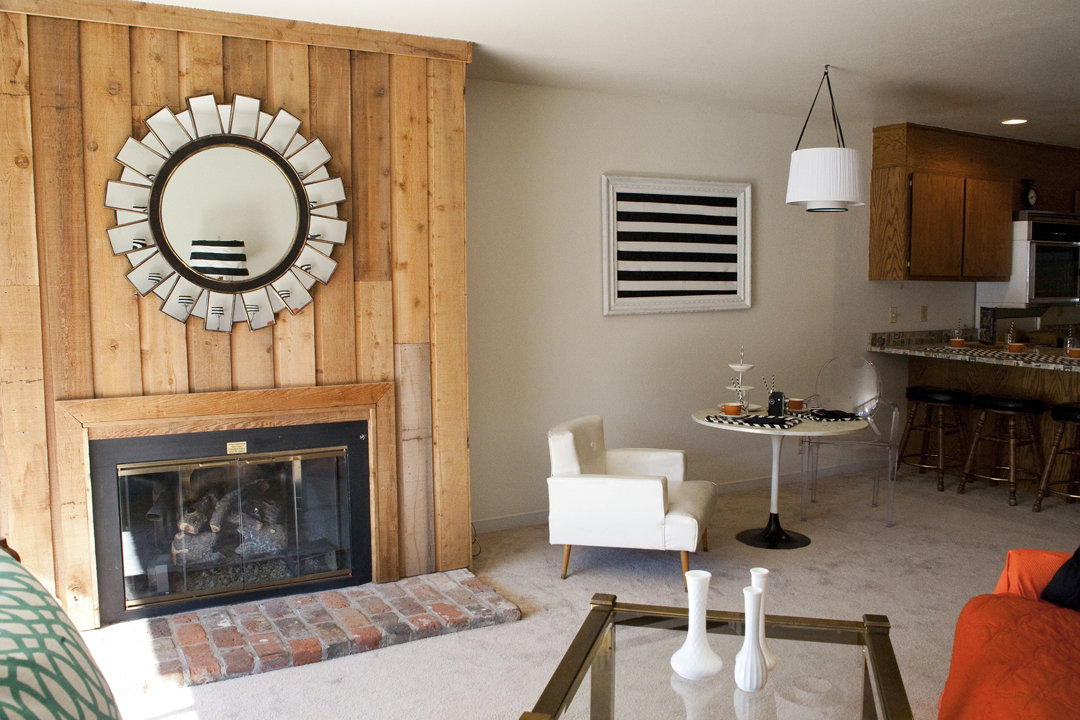
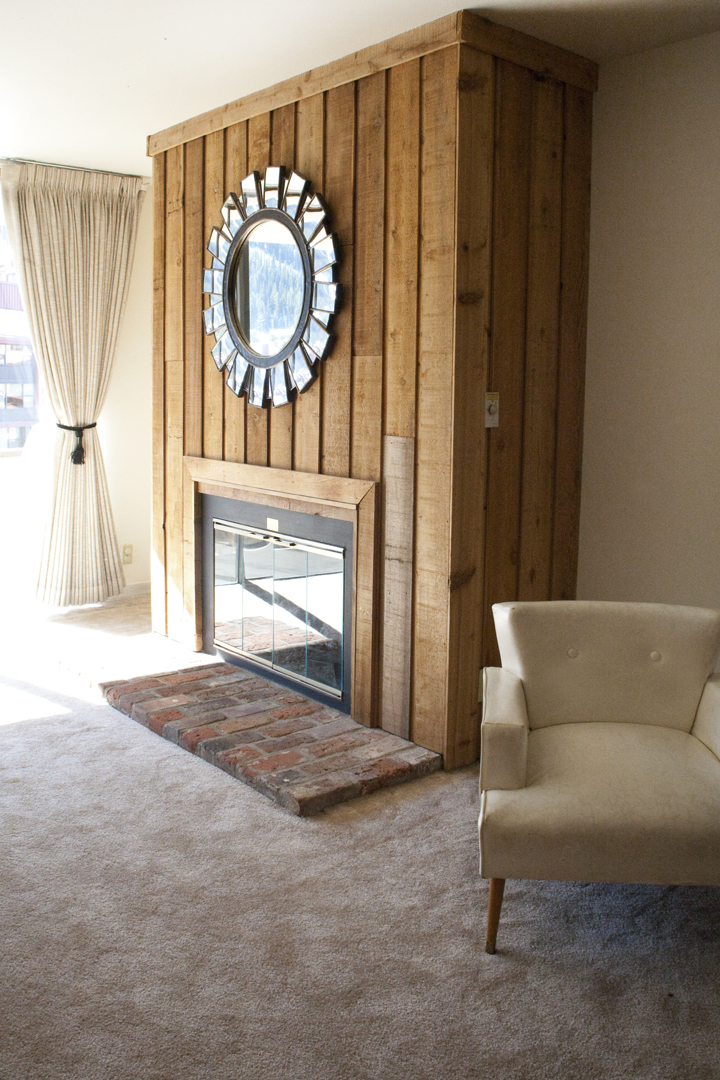
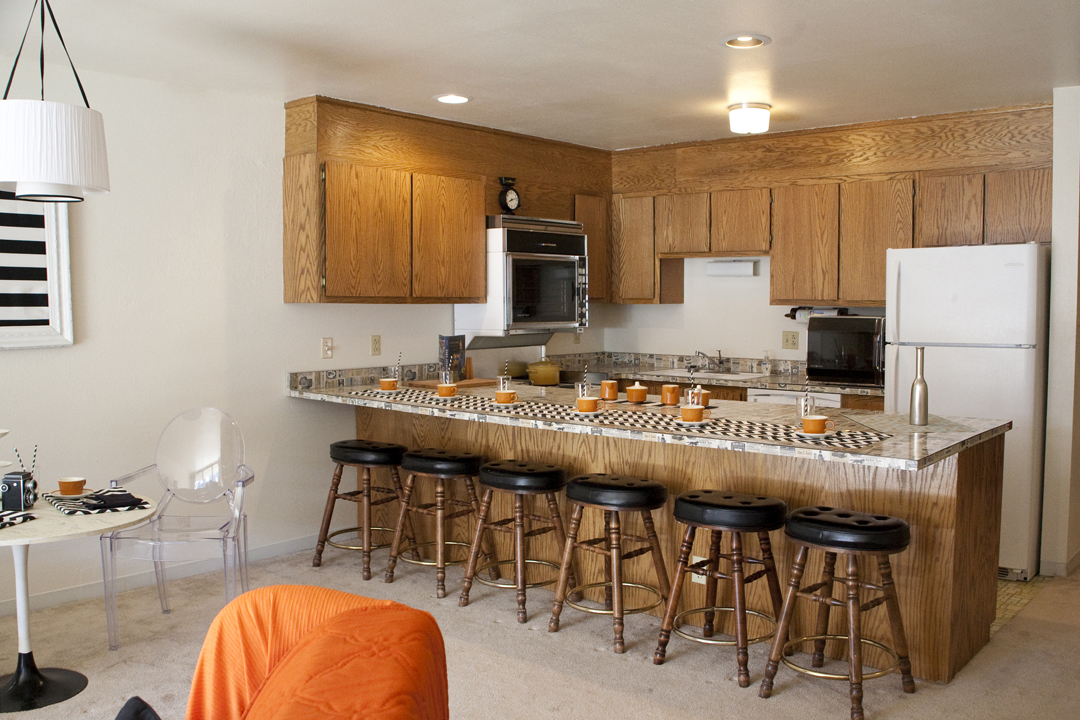
So maybe your home isn’t perfect, but surely there are some great features, after all, you bought the place, right? Think back to the things that originally drew you to the home. Play up these strengths. In this condo, the countertops were dated and the bathrooms could use an upgrade, but the gorgeous natural light, open floor plan, and large rooms were easy to focus on. We tied back the curtains to make sure buyers get a full view of the huge glass panels. We accessorized each countertop, sticking to our color palette, added minimal accessories and created an outdoor seating area that’s alluring to potential buyers. Find the unique and appealing features in your home and focus attention on those.
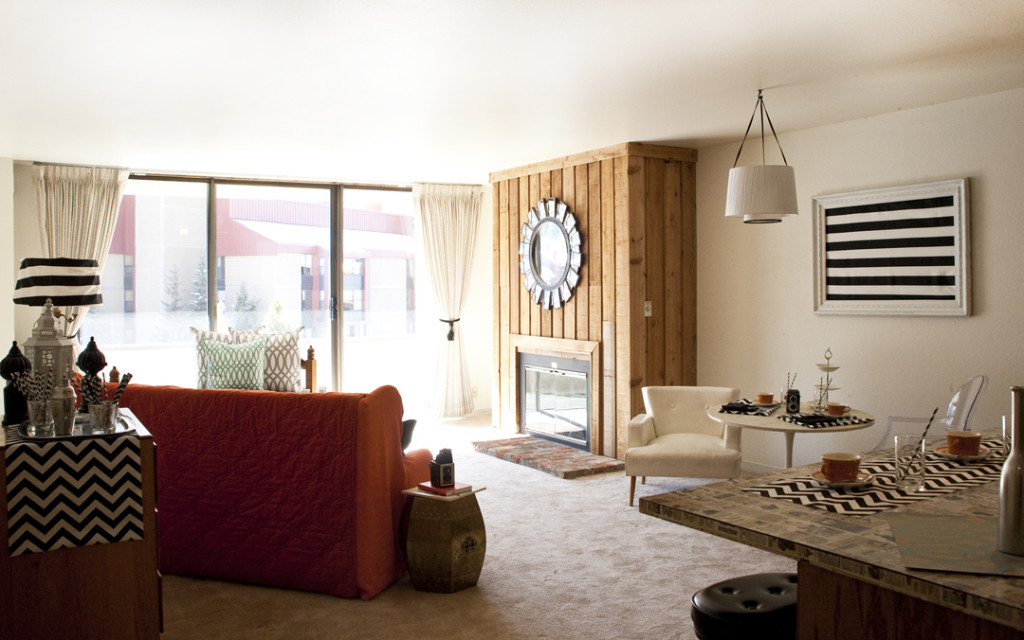
4 – Establish Areas
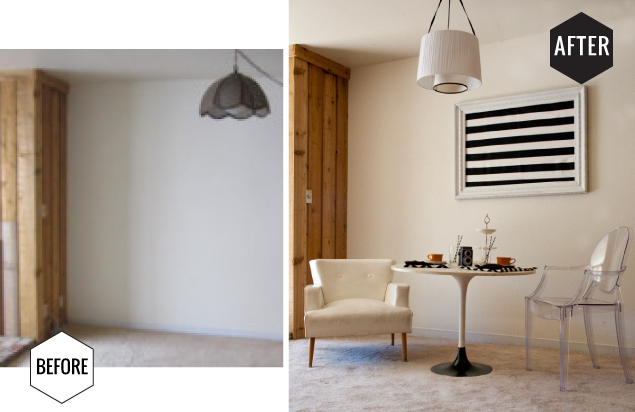
While open floor plans are very appealing, it’s important to show the buyers that the space can still be broken up into functional zones. We established a dining area in the large living room, and created a small bar area along an open wall. We also defined an inviting entry way with a seating area for potential buyers to sit and remove coats or snowy boots and enjoy the space. If there’s unused rooms or spaces in your home, don’t kill yourself trying to fill the space, instead use simple pieces to hint at the possibilities of how the new owners could use the space. Large open spaces can be daunting to buyers, so give them some general ideas on how to utilize the rooms.
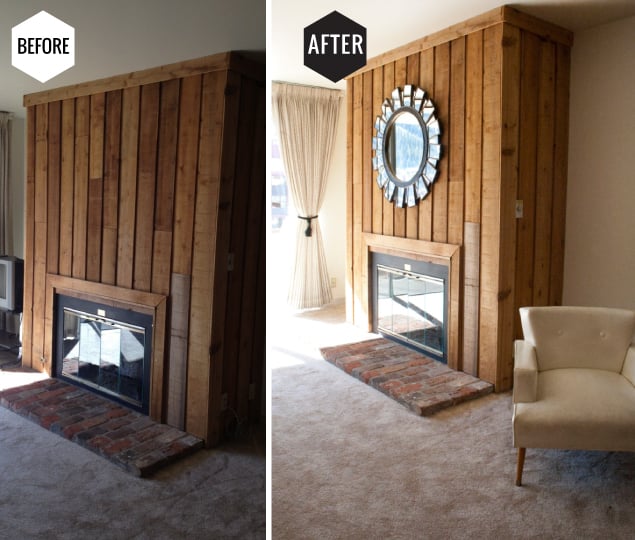
5 – Lighten Up
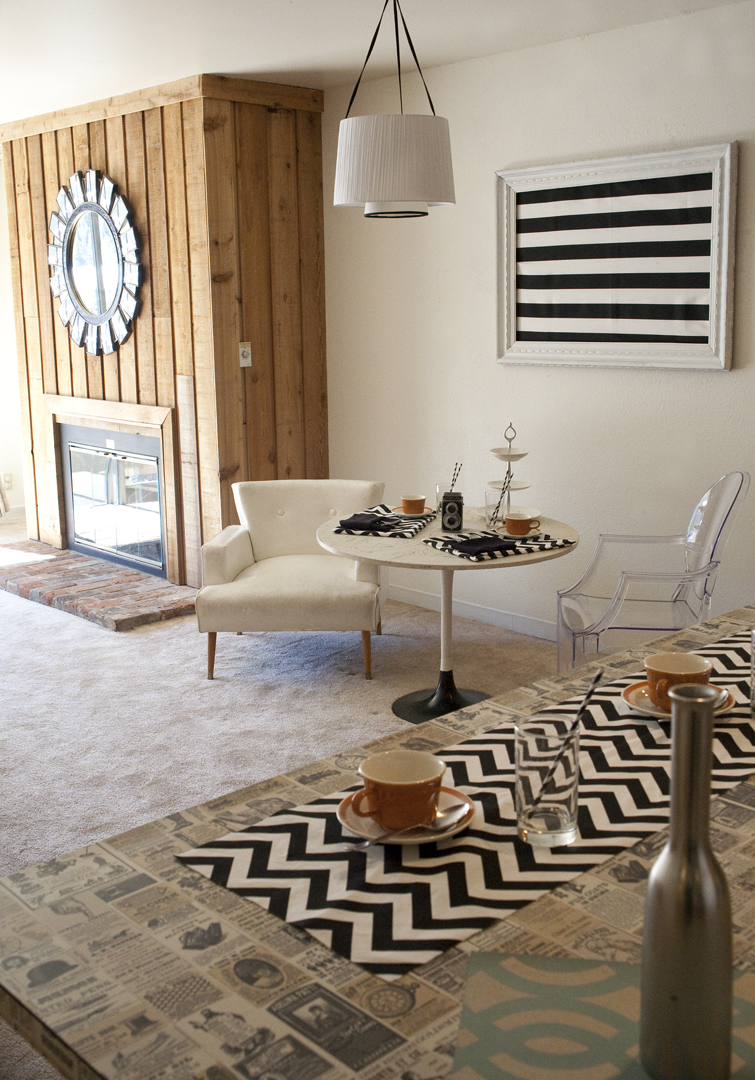
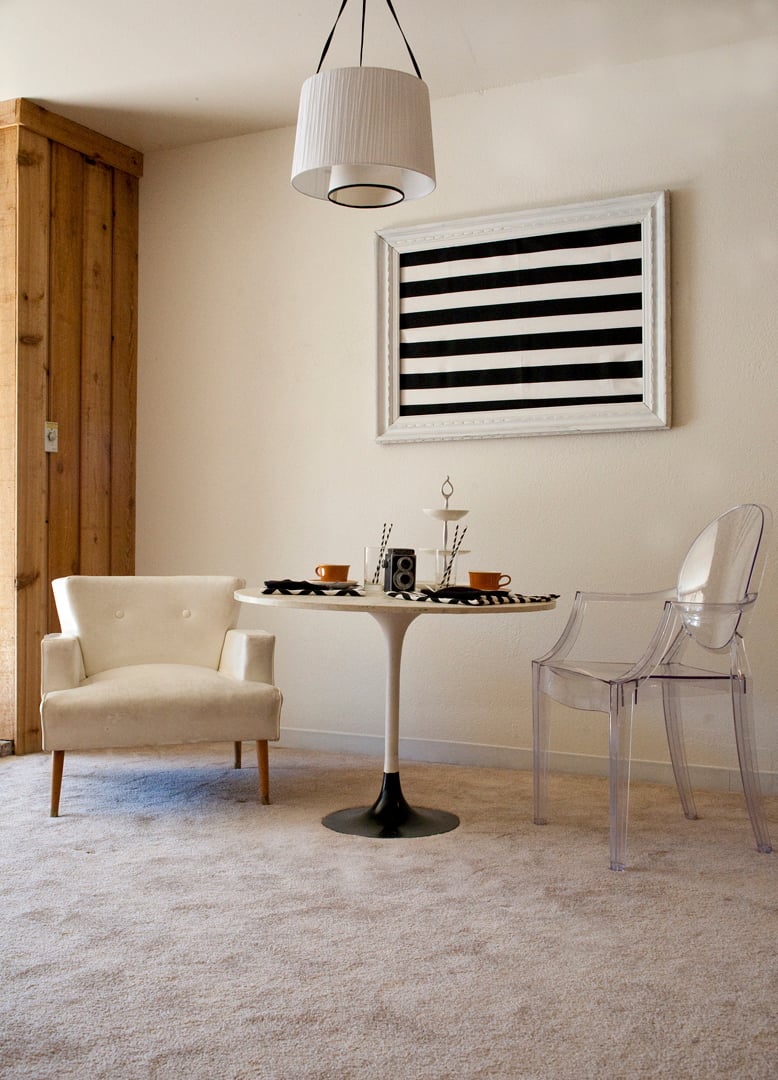
A simple and easy trick is employing mirrors to visually double your space. By using mirrors and reflective surfaces, you can amplify a home’s natural light, and create a more open feeling layout. In this condo, we scattered large mirrors throughout the condo, including a large round mirror above the mantel, not only brightening the space, but also creating a focal point for this large room. We opened the curtains all the way, and used tassels as tie-backs to add a touch of glam. In your home, try placing mirrors across from windows to bounce natural light around the room.
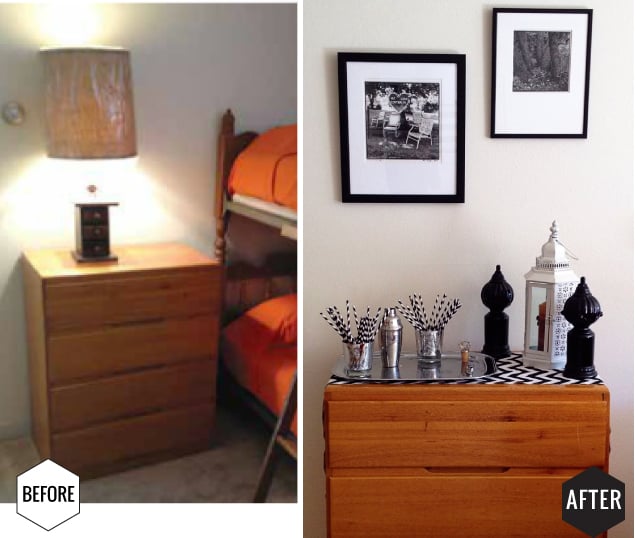
6 – Repurpose
Rethink how you use the objects you already own. Create a fresh feel by simply moving furniture around and finding new ways to use pieces. We took the dresser from the guest room and turned it into a bar top in the living room. Since this is for staging, the pieces don’t have to entirely fit the bill, as long as they are hinting at the idea for the buyers to recreate. While they may not opt to have a bar in their new home, it shows that the space can be utilized as it’s own area – possibly a small desk, bookshelf, or reading zone. We also removed a second bunk bed from the guest room and used the lower half of it to create a daybed/lounge in the living room. This allowed for additional seating without blocking the views. Look at the pieces in your home with a new eye; swap out your nightstands for the end tables in your living room, move a lamp to a different room, or if the space can survive without it, remove it!
7 – Functional Spaces
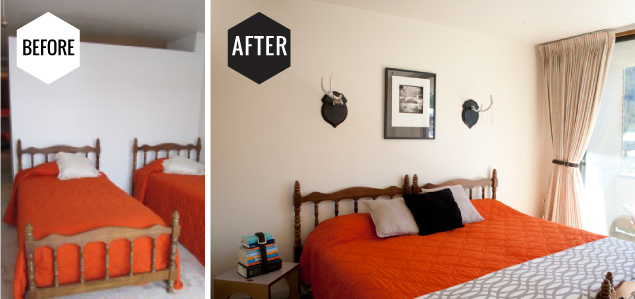
Make awkward spaces functional and utilize every square foot of your home; turn a wacky space into an intimate reading nook, make a small bedroom into a dressing room…and you’ll have the future woman of the house hooked. In this condo, there is a large master bedroom with beautiful glass windows, but there were two twin beds in the room when we started. So we simply pushed the beds together and rotated them to be on the longest wall in the room. This created a more romantic atmosphere and assures buyers that a queen or king bed will fit into the room.
Whether you’re thinking about selling your home, or just need a fresh start, these steps are sure to spruce up your nest. Continue scrolling for more after images.


Need assistance? Contact your Nest Broker to learn more about local home stagers who can help you get your home market ready!
airbnb cleaning
Written on
This one makes my jaw drop. The photos look really awesome. Thanks for inspiring.
Jasmine Bible
Written on
Thank you!!! We appreciate the compliment!
airbnb cleaning
Written on
This home is really welcoming. Impressive!