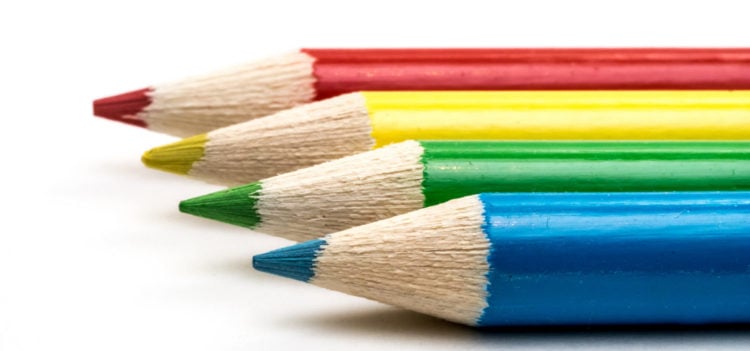
As the end of August creeps closer and closer, there’s no denying that it’s about that bittersweet time of year again–back-to-school. While it’ll be nice to have the kids busy learning at school, a new year means new school supplies. brings clutter, endless papers to sign, colored pencils and glue to sort, and general chaos!
Say goodbye to heaps of supplies and say hello to DIY organizational tips and tricks that will keep all of your kids’ back-to-school materials in one place! Nest Realty’s tips and tricks for back-to-school organization include simple, DIY ideas that will aid with paper and supplies storage. Read on to find out how to make this year’s back-to-school season organized and exciting for the whole family!
The first general guideline is to buy a family planner. A dry erase board, bulletin board, or a large spiral-bound planner will work perfectly. In addition, posting the daily routine on a white board with help the kids establish a morning and bedtime schedule. Use an illustrated checklist to keep the kids engaged and excited by the daily routines!
Papers
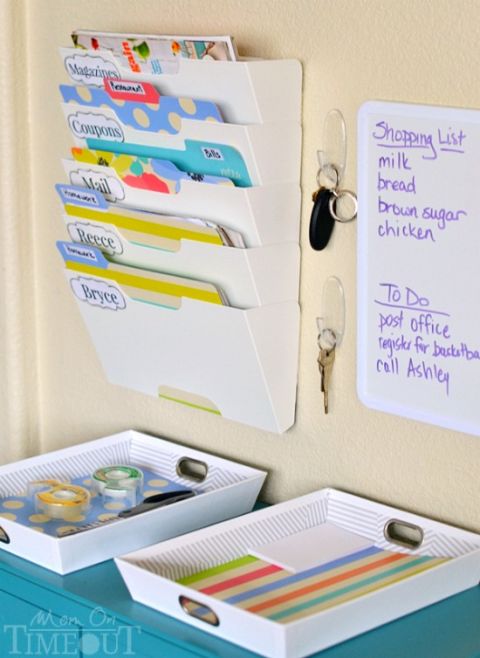
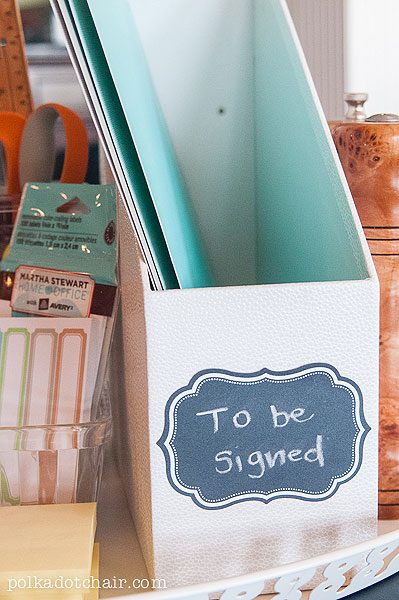
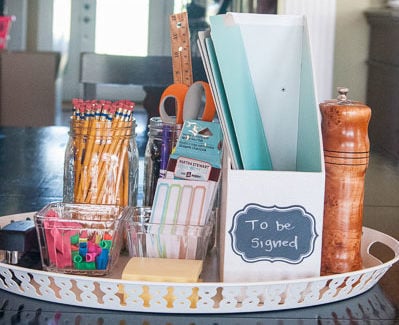
You’ll get plenty of loose-leaf papers from your kids throughout the year, especially permission-slips. Set up a “parent inbox” from a file bin for your kids to drop their papers that require signatures.
In addition to a “parent inbox,” put each child’s work into a separate bin–make sure to sort the papers throughout the year. Create color-coded tabs for each school subject within the file box or cabinet drawer.

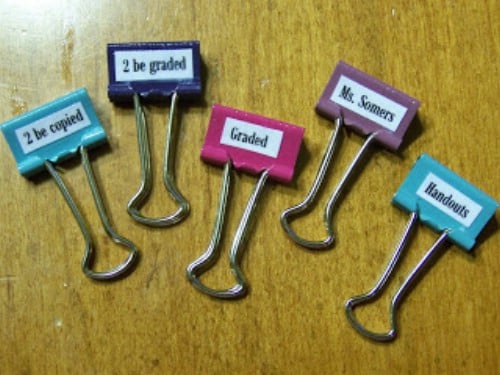
An alternative to color-coordinated tabs are labeled binder clips. Create labels based on subject, or if you’d like to combine the color-coded tabs and binder clip techniques, label the tabs as “graded” or “due later” and continue to file the papers away by subject.
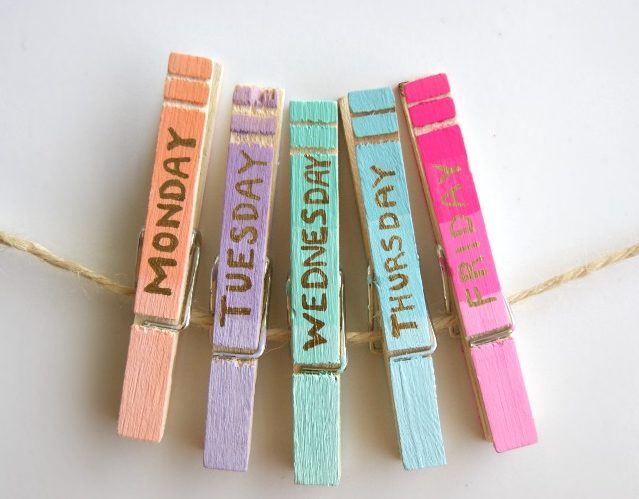
If you’re short on space and still want to categorize papers while remaining decorative, consider using labeled clothespins! Hang up a length of twine or string on the wall, and then label and decorate clothespins. You can hang your papers on the wall! In addition to homework, attach reminders or notes on cards for specific days of the week.
Supplies
At first glance, the lengthy school supplies lists at the start of each school year seems excessive–will they really need both glue sticks and liquid glue? Tape, too? And yet, less than a month later, all of these supplies are unpackaged and scattered throughout the house. Luckily, there are a number of DIY storage receptacles that you can create that will manage all of these loose objects for you!
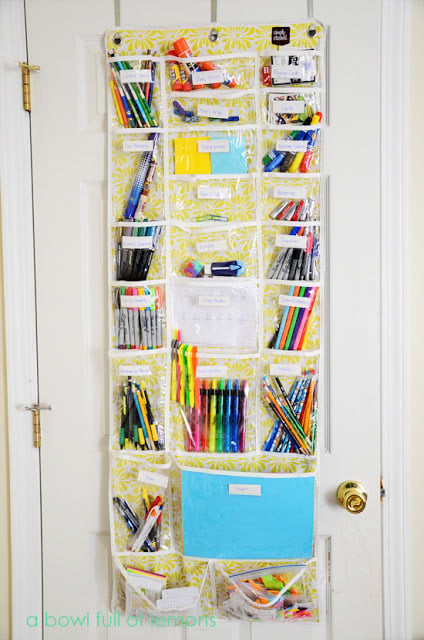
Over-the-door shoe organizers are perfect for holding crayons, pens, pencils, and all kinds of other supplies. Plus, they’re easy to access and take up barely any room! Purchase a transparent one that will allow you to see everything you need from a glance. Apply sticker labels on each section of the organizer to help guide kids to put each material back in the correct area.
Dedicate a specific “Homework Area” for your kids to focus on their work without spreading supplies all over the kitchen table! Stock a tray with supplies such as paper, pencils, and sticky notes.
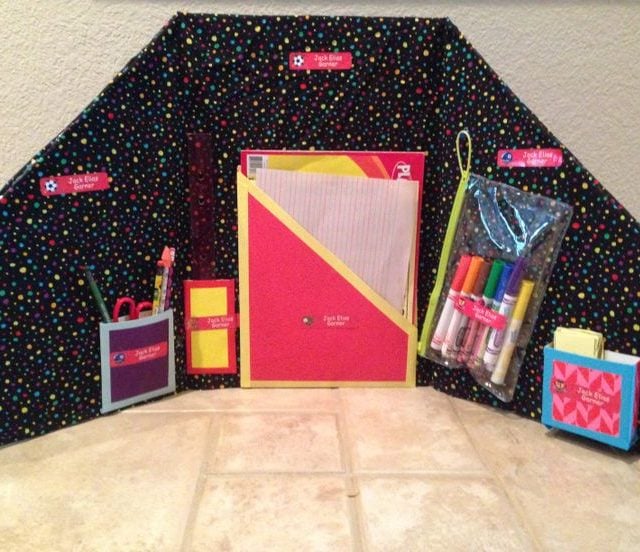
Next, prevent distractions and designate specific areas for work by creating homework station dividers. These are fun for kids because they can be decorated however they like, too!
If you have a specific homework area, decorate clean, empty cans and use them to organize school supplies. You’ll be re-purposing, saving money, and saving space!

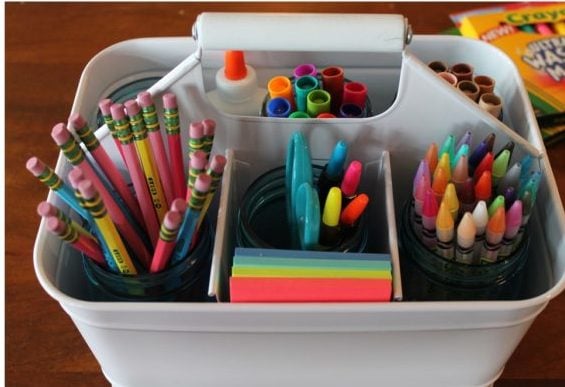
If your kid doesn’t like to sit in one place everyday when completing homework, create a mobile school supply caddy. Purchase a caddy from any kind of container store. Then, label each compartment to keep all the supplies in their place–now your kid can carry everything around without making a mess!
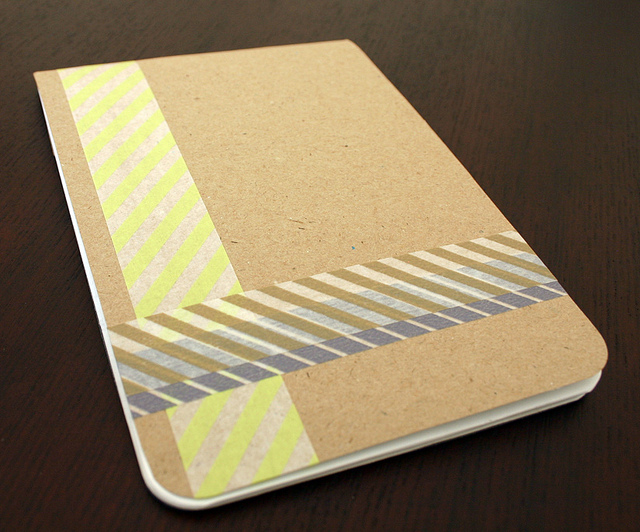
Use washi tape to label different notebooks for different subjects. Eliminate confusion while adding a decorative flair to notebooks–two-in-one!
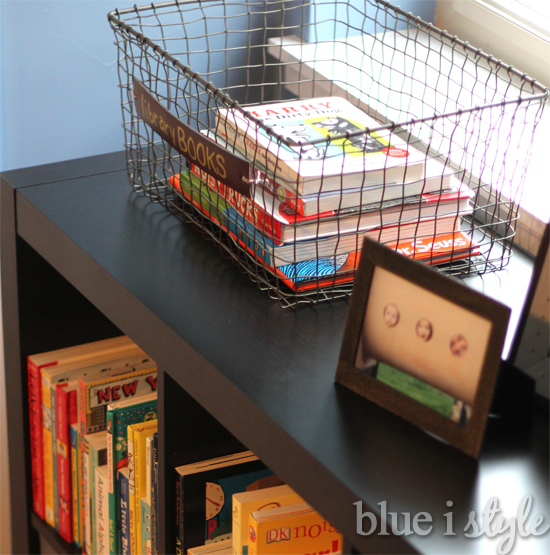
Similar to the “parent inbox,” keep library books in one place with a designated library-book basket. Say goodbye to late fines!
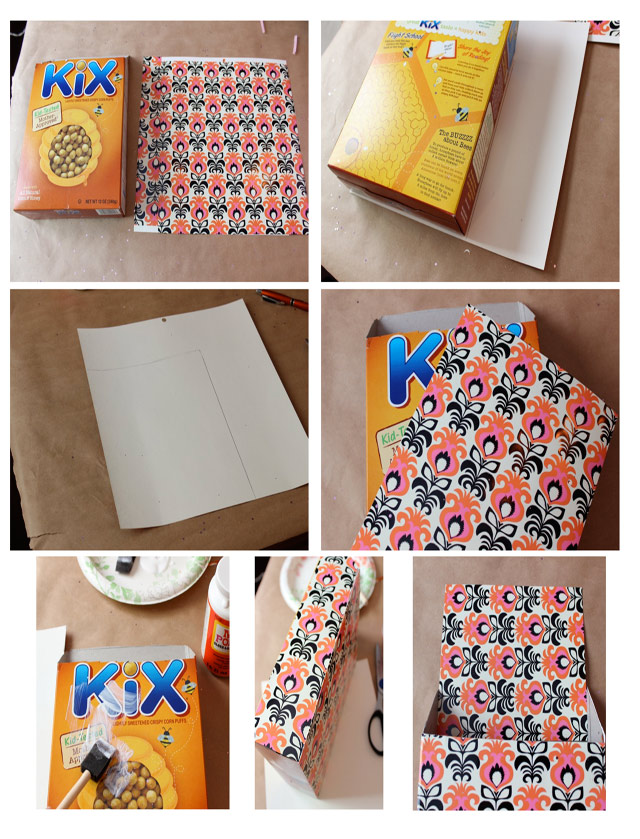
Transform a cereal box into an organizational holder for notebooks, magazines, papers, folders, binders, and more! Simply cut off the top of the cereal box at the angle that you wish to stash papers. Next, use decorative paper and wrap the exterior of the box like you would wrap a present!
 Now that you have some easy tips and tricks under your belt, you’re on your way to a stress-free, organized Back-to-School month. Get excited for a new school year! Happy organizing!